Wednesday, May 25, 2011

Back to the comunity

Hi everyone I know I been absent for a wailed, but I will try to stay more connected in the blog, and post more ideas, recipes etc. I invite you also to share any ideas or suggestion you may have to keep growing this blog.


Thank you again for your patience and see you soon :)


Nelda

Thursday, March 3, 2011

Castle Pinata


These are simple steps to make a castle piñata for a birthday party.


In this days we have different techniques to create a piñata, you can do with the basic elements like news paper, glue and tissue paper, exist also different glues like hot glue and other type of glue that people been use.


Materials:


Cardboard box rectangular (the sizes can depended of how big you want hem)

Corrugated roll (if don’t have you can use a cardboard box)

Construction paper

Tissue paper two colors

Scissors

Glue

Sponge brush

Tape

Rope

Knife


            In the rectangular box, make holes in the sides of the box, and insert the rope from one side to the other making a cross, and in the tap make the holes and pas the rope to and you form the handle to hang the piñata; and close the box with tape.


With the corrugated roll (or the cardboard box*), measure the size of the rectangular box and left an extra peace to attach to the box wit tape; you will do the same to the other size.


* if you use the card board make couple cuts in the are that will bee inside so you can give the round form.


After attach the sides to the castle, you need to close the bottom of the sides wit cardboard; trace the shape and cut, you en clue or tape.


For the top, with the construction paper you make the cone that fit in the open en glue them.

The details of the windows and the door you can make them with black construction paper if you want to put flags in the towers, you can do them with a toothpick and a triangle construction paper.


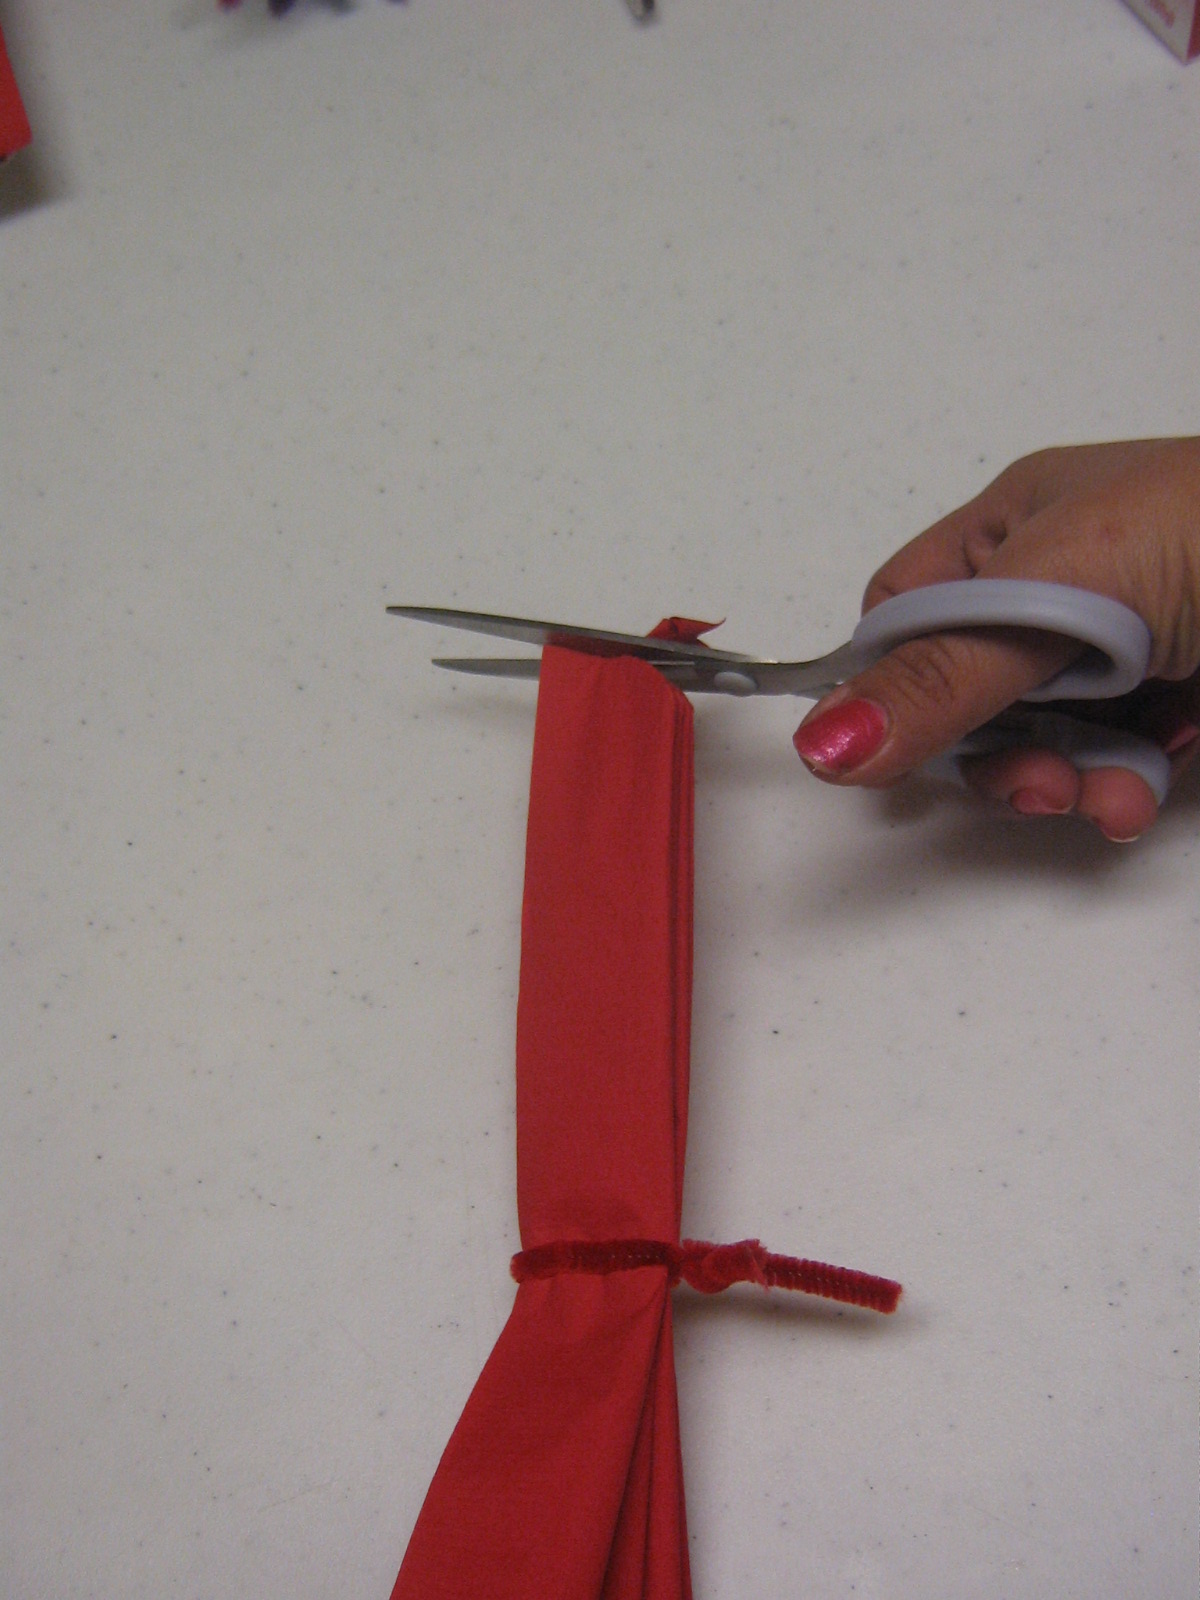
With the tissue paper you will cut them in strips of 5 in. and make also the cut vertical (see the picture)


The quantity needed will depend on how big is the piñata. You may want help in that part or cut enough and save the left over


Now that the shape is form, the windows and the door are glue to the castle; we star to decorate with the tissue paper. With the sponge brush apply glue directly to the cardboard and start applies the tissue paper going around the piñata.


For the bottom you can use a sheet o two you just glue them to cover

When you finish to wrap the piñata with the tissue paper, you need make the hole to put the candies


Monday, February 21, 2011

Blog Giveaway

Yes, I started this blog almost 2 years ago today. I wasn’t sure what exactly I was doing when I wrote my first post, and sometimes I think I still don’t! But I’ve had some great fun, met some awesome bloggers (both through our blogs and some in real life

Thanks to everybody who comments and follows me. It means a LOT to know that people are reading what I post. I’ve decided to do a giveaway


Enter for a chance to win a Punch around the page LOOPS from Martha Stewart


Here's How To Enter To Win


Leave a comment  (Leave a comment and valid email address with each entry)


• Additional Entries:
- Follow my blog

- Like Multicultural Crafts on Facebook.

- Put the Multiculturalcrafts Button on your Sidbar.

- Add Multiculturalcrafts to your blog roll

- Blog about this giveaway and leave me the link to it.

- Subscribe to Multicultural Crafts


 Giveaway Ends Wendsday  March 2nd at midnight. (Estern standard time)

 Random winner will be selected through random.org


Monday, February 14, 2011

Valentine's goodies

Happy Valentine's Day every one, today is the day to express the Love, here I want to show you some of the goodies that I made for my girls friends at school


                                                               Valentine's goodies


For the boy we make a bombs, I fine this cute projects in skip to my lou blog, I just change what i put inside. You can see how I do these here


For the girls I make this little bracelets and purses, I find this tutorial in  Merrimentdesign


and this filled hearts I do for the teachers and my co-workers, and I find this at Shabby Chic Crafts


Hope you enjoy it


Valentine's goodie

Here is a Valentine's goodie that I found in Skip to my lup blog, I think was very cute for the boys


You will need:


- tissue paper ( black)


- pipe cleaner ( red and silver)

- candies

- red cardstock for tags


cut the tissue paper in circles of 10", put the candies in the center how show in the picture


wrap the candies together, making the little ball


put the silver pipe cleaner in the center and tight the tissue around it, with the red pipe cleaner you tide it where are my finger up, make sure tight it


last put the tag


hope you enjoy it


Wednesday, January 26, 2011

napking paper flowers

Valentines is around the corner, between work kids and hubby I been do a little crafts, I start with this napkin flowers.


The flowers are super easy to do, I saw last year the tutorial in dana made it, and I make some for my little girl birthday party.


To make the napkin flowers you will need:


- Napkins (you can buy in the dollar store)

- Pipe cleaner

- Scissors


First you unfold 4 napkins of the same color, for the center I use something that contrast, but cut the border of this so get a little smile, how I show in the picture below


When you have your napkins together you star to fold all of them about an inch each fold to form a fan


In the middle you will tied it with the pipe cleaner, you can use string also.


After you tide it, cut the ends to give the shape


Now you open the petals and give the shape


And it is done


Here is one of the places I put this flowers


Saturday, January 22, 2011

Valentine mobile

Yesterday my honey wants to go to big lots! Store, I went with him and found this stickers (was a good deal because the bag come with 6 packs) and I only pay $1.00 for it; I like the shapes and the sparkles and this is what come in my mind.

 
 My Valentine mobile . . .


For this I use:


- Stickers (you can cut the hearts in felt or paper)

- Embroidery hoops

- fishing line

- Pom-poms

- Ribbon


First I wrap the ribbon around one of the embroidery hoop and put it aside. After I measured the lent of my mobile and left like 20 to 25 inches for tide it to the embroidery hoop


With my strip already cut, take the stickers, and put two of the same in between the stickers, add a pom poms and sticker, you create your own pattern; when you done you can tide them in the embroidery hoop with the rest of the fishing line, pull all together in the center to make the loop to hang it, and you are done


hope you enjoy . . .


Wednesday, January 19, 2011

Valentine Day wreath

Valentine Day wreath


I saw this today and I want feature this idea today! This is from Moms of All Trades, she made this with Cardboard, Ribbon/twine, Glue and Embellishments (old shirts, beads, felt, buttons)

hope you enjoy it like I do. . .


Valentine wreath

This past weekend, I was working on my Valentine wreath for my door, I get a little busy between my work and my home, but always I make time to craft something.


I star wrapping around the heart shape with tulle


Next I make my flowers; you can find the tutorial here, they are super easy to do.


Now you can star ensemble the wreath, if you use brass, just pin the flower to the foam heart shape, if you use buttons you can glue them in.


In the back I pin the ribbon, to make a bow and hang it  in my door.


hope you enjoy . . .


Prima Flower

My mom was looking in the web, and sends me a picture of a flower and asks me if I can do it.


They call it prima flowers


For this flower you will need:

- Tulle any color

- Scissors

- Tea candle with a glass

- Tweezers

- Brass


first of all you need to determine what size of flower you want,  for this I use a 3" circles you need about 7 and a bras, you can use a plain brass or decorative, if you use plain you can put on tap a pretty jewelry or button


After you cut your circles, you folded in a 1/4, and hold them with your tweezers, how I show you in the picture


light up your candle, and get close the tulle, only need the warm, not direct to the flame, (tulle burn real easy), recommended you try one first, can a rotate it around, to the ends of the circles get crispy a little bit.


The circles my glue together but don’t worry, jus take them apart and unfold it. When you done with all the circles it is time to ensemble the flower


You will star overlapping each circle (I use 7 circles for this flower), when you finish, use the brass in the middle, and open it, you can use a gem or a button to give different finish; and is done.